Every girl is a fan of bags n clutch wallets …well who isn’t?
The more u have the less it is .when you go for your bag shopping what do you
have in mind? It should be simple, stylish and should be different from the
rest of the collection
. To be frank, as a crocheter, I always have problem picking up bags and wallets. No am not exaggerating. Sometimes the colors are too bright or the shape not perfect. So I end up with my own crochet version. What I like about my versions? Well they steal glances….Anyways I thought of sharing this clutch wallet pattern .it will definitely give you some attention ….guaranteed!!!! very helpful for knick knacks.... So here goes:
. To be frank, as a crocheter, I always have problem picking up bags and wallets. No am not exaggerating. Sometimes the colors are too bright or the shape not perfect. So I end up with my own crochet version. What I like about my versions? Well they steal glances….Anyways I thought of sharing this clutch wallet pattern .it will definitely give you some attention ….guaranteed!!!! very helpful for knick knacks.... So here goes:
Materials required:
Well I am not specific about the yarns .you can use any
thing with which you are comfy crocheting .I personally use acrylic/polyester spun
coz being synthetic it retains the shape much better. Any cotton yarn will also
be fine
Hook size too depends on the yarn .i use a 3 mm hook for my
synthetic versions
Abbreviations:
Single crochet =sc
Half double crochet=hdc
Double crochet=dc
Slip stich=slp st
Pattern:
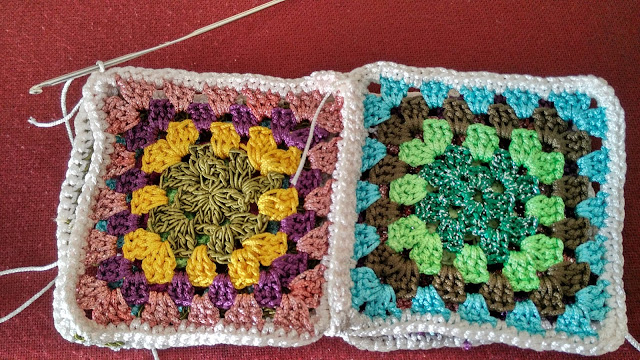
For this pattern you will need four granny squares. Now when
you are done with your square sc around with the same color yarn you will use
for joining all the squares. This way you will ensure that the look is even and
will hide some imperfections if there are any.
Now start joining the squares .we will first join the mid
section Hold the squares wrong side facing down. Match
the stitches and join .I used the slp st method as it give a nice ridged look. For
those of you who like it plain join the squares right side facing down .after
joining open up .it will give you a plain look rather than the ridge one.
Moving on we now have to crochet the sides and the bottom.
Hold the wallet with wrong sides facing each other and sc all around. Start
from the side first then move to the bottom and finally the remaining side.
Don’t fasten off. Hdc around the mouth of the wallet
For the flap:
Using a different color yarn, begin from where you fastened
off.
Continue with this pattern till u reach the end of the side
you are crocheting. You will now crochet back and forth.
Chain 4 and turn. Dc
in the dc of the previous row .chain 1 skip a st then dc
Continue with this pattern of back forth crocheting till u
get 6 rows.
Now chain 4 and turn continue with the pattern till u reach
2 st before the middle one
Now chain 8 and dc in the next st.it would help if you count
the st on the flap and then continue as we are making a loop for the button
.the st skipped should be uniform on both the sides
Now chain 1 and turn sc in each st around. Fasten off.
For the button:
Make magic circle and do 10 sc slp st to join
Chain 3 now do 2dc in each st around slp st to join
Chain 1 decrease every stitch around .stuff with cotton or
poly fill
Keep on decreasing till u have no stich left. Fasten off.
Mark where the loop is and sew it on the wallet.


Very nice friend... but im not familiar with the stitch names.. can you name it with pictures followed please...
ReplyDeleteVery nice friend... but im not familiar with the stitch names.. can you name it with pictures followed please...
ReplyDeleteSure!!will do a tutorial on the stitches
ReplyDeleteSure!!will do a tutorial on the stitches
ReplyDelete